i

Well, I broke my promise not to work below freezing, but it's not my fault!
88 damaged her mast (or we did it for the boat, rather) and we purchased a new one from Cape Cod Shipbuilding. The mast shipped towards the end of the boatyards winter break, and was scheduled to arrive a little earlier than we planned. Since the mast is in a 40' 400lb crate, they require someone to sign for it and push it off the truck. My dad thankfully agreed to wait at the yard with me for it in 20 degree temps (inside)
While we were waiting, we got some work done. 88 sustained a bunch of cosmetic damage while on loan last summer, and it's requiring some work to the gunwale, so we had to take off all the teak toerails. We're likely going to install the vinyl rubrail, which is a bit ugly to my eyes, but better than repainting the boat! Removing the wood toerails took a lot less time than I thought, so we attacked the next work item: the mast step.

While I'm perfectly happy with our location, the wooden mast step support has been rotting, and I noticed towards the end of last year that it's got tiny little insects thriving on it! So I thought it would be a quick job to pop out the rotted wood part and then make a new aluminum or composite piece. Wrong. It took 2 guys 2 hours just to remove the parts from the boat. Our boat has the strangest mast step I've ever seen. It's 4 3/8" studs, somehow attached to the mast step subframe from underneather, on top of which fit: 1/8" stainless plate, big wood block, stainless plate with ears for tie rod system, then mast step casting, then years of crud. The alnuminum wasn't isolated from the stainless (grr) and everything was glued. I think this was done by the same malevolent spectre of boatwork that 5200'ed the jib tracks on.

We finally got it all apart, and it will be short work to make up a new part and reinstall. After that we'll check our mast step measurement (we don't have any room for error there!) Only thing I'm still pondering is whether to make the mast step angled or flat. The class rules are a bit vague here, but I've noticed that most east coast boats have an angled step. This means that the mast bears evenly across the mast step, reducing stresses on the mast and supports. J22's had this issue, and now all use angled steps to prevent the decks cracking. However, a flat step is what came stock on the boat, and also the flat step dials in a bit of prebend as it supports only the aft part of the mast section. Not sure what to do there.
Victor 3 hrs
Kristian 3hrs
While all this was going on, the truck with the mast arrived, and completely ignored all the instructions (call me!) and tried to deliver the mast to the metal company next to the boatyard. They called up a boatyard manager (on his Xmas break!) who came in and unloaded the mast solo. I feel like a jackass, especially since we wer 100' away and could have helped, but were sitting there waiting for the phone to ring. Sorry Eric!
The next thing we did was more fun (but even colder) as Brian Shaw came into town and helped me unload and move the mast.

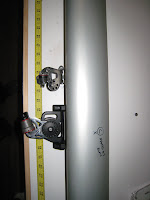
The crate took about 45 minutes to break down enough to get the mast out, and then we walked it across the yard, through a ridiculous minefield of parked stuff in the lot, and made it into the Shields shed with inches to spare on either end. Then started stripping the old mast of it's rigging to reinstall on the mast later. It was pretty darn cold, so we grabbed the new boom and took it into the shop to figure out our control specs and layouts for outhaul, mainsheets, vang etc. Brian is into this kind of stuff, and will be using it all, so it was good that he had input into.

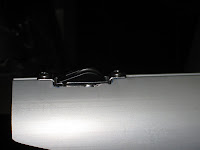
We got it all figured out, including the strangely specific class mandated locations, except for the location of the single mainsheet turning block bail, which seems to be required to be in 2 locationa a foot apart. Huh? The written rules say it should be 3 inches from the black band (unlikely since thats on the tapered part of the boom) but the class rigging plan says it should be 1' 1-3/4" from the band (more likely since thats approx where every other boat has it) I'm not sure how important the accuracy is here, especially since I've noticed other boats had this stuff all over the place, but as long as we're doing it, we might as well do it as best we can. That and I have a new rigging shop, and can do this all on the bench, so it's good practice to be exact. Next step is to install all this stuff, and we've got some great tricks which will be in the next installment. The highlights are: an 8:1 internal fine tune, replacing the clunky old (plain bearing!!!) mainsheet headknocker with a Harken flip flop ratchet block, further devlopment to the vang "soft bail" and more.
Brian 5 hrs,
Kristian 5hrs
 I drew up a design, my dad processed it and had it made up on a friends cad mill. It's made of thicker material than the stock ones (which bend and bounce around a bit)


