Sunday morning, nothing going on, but the yards closed.. what to do?
Had an hour or so this morning with nothing going on, so I decided to poke around the box of hardware I pulled off the boat. Tackled a couple of the really tiny projects that I would probably usually save until last minute.
Headknocker: For those that haven't sailed on Shields, they have a couple unique rigging bits. One of my favorites is the mainsheet adjustment. Unlike nearly every other racing boat out there, the Shields mainsheet cleat hangs off the boom, on the aptly nicknamed headknocker. Adjustment is made direct from the boom, sometimes with 2 or 3 people pulling from the rail. Also, most headknocker setups use this Nash trigger cleat, which allows you to ease the line by pulling straight back on the clear. This opens the jaws, and lets you do small adjustments kind of like a ratchet. Ours was ok, but the Nash cleat was jammed , and I'm not so crazy about the sheave. Like most things, the cleats respond well to being taken apart and cleaned. I happened to have a spare spring, which was good, as one of ours was strangely missing. Also odd was the lack of an eyestrap on the cleat, but luckily I had one as well. The sheave is a plain bearing plastic sheave, which I'll replace with a ball bearing sheave as soon as I find one that fits. I had one that went on 150, but for the life of me can't recall where it came from.
Cunningham: You know it's really a slow day when someone makes a post about the cunningham! There's actually a couple details here that are indicative of how I want to rig this boat. The original blocks were ok, the line was disgusting and there was a wire pennant going to the hook. While I'd like to put some nice tiny carbos on here, I don't want to fix what isn't broken.Details: top pennant is 1/8" New England Endura 12. Plenty strong, if I carried smaller I'd use that. Although they're heavy I decided to reuse the hook on the top for sail changing convenience. The control line is just a small length of Swiftcord from my line tails box. The line's been reeved with the blocks at right angles. For any 4:1 or higher purchase using side by side blocks I find this works great; avoids tangles and friction from the lines crossing. I didn't splice this line as it's totally unneccesary for the loads involved, and a proper splice would bulk up the line. The most interesting thing is the soft shackle on the bottom. I'll use these wherever possible on this boat. This lets the block articulate like a swivel shackle, but is less weight and definitely higher on cool factor. Here's another shot of the type of soft shackle I like to make:
These are made with an unstitched bury splice at one end, and a stitched knot at
I also pulled the sheave boxes from the main and jib halyards. Class rules and the mast dictate that you use these Schaefer boxes with a combination wire/rope groove. This boat had one very new sheave, and one that was very worn and probably original. The old wire/rope halyards really do a number on sheaves, and I wasn't sure if I could clean up the groove enough to use a new tapered halyad. After a good bit of sanding the surface was nice and smooth and ready for reinstallation.
I wanted these perfect, as a sheave worn by wire will absolutely slaughter a tapered halyard if not prepped right. One of the common customer service issues I have is with people changing their wire/rope halyards to fiber. Before I make the halyard I always ask about the sheave condition and point out that it probably needs sanding at the least. Lots of people listen and check/fix the sheaves. More often though, they say "oh its fine" without having any idea what its actually like, it just doesn't seem that important to them. Sometimes they're right, and theres no problem, sometimes they call me back hoping I'll replace the ripped-up halyard for free. I've seen some truly nasty looking sheaves, usually after someone wants to know why their halyards look like they've been attached by sharks.
Anyway, thats a pretty weak update, so I'll post this prospective paint scheme. My graphic skills suck, but Bill at www.knockaboutsloops.blogspot.com loaned me his line drawing for testing paint colors, and even returned the lines to one design configuration, thanks Bill!
I really like gray boats, and haven't seen a Shields done that way yet. This probably won't happen until next fall, due to money/time/temperature concerns. The topsides and deck don't look great, but I'd rather put time and money into speed and strength, and I can live with an ugly boat. For a season anyway.
Sunday, December 23, 2007
Wednesday, December 19, 2007
Keel Update
Quick stop by the boat today, as I had some actual work to do on customers boats.
Sanded off the old fillers on port side now, looks very good. Need to clean up the low spots and I can apply fairing compound.
Hrs 3
Not going to be able to finish up the keel by christmas, as the yard closes on thursday for a few weeks. Drag!
Sanded off the old fillers on port side now, looks very good. Need to clean up the low spots and I can apply fairing compound.
Hrs 3
Not going to be able to finish up the keel by christmas, as the yard closes on thursday for a few weeks. Drag!
Thursday, December 13, 2007
More Keel Work/Soy Strip Update
Made great time taking the bottom paint off the keel, and began sanding/smoothing the keel out. Glad I'm taking the time to do this. It would bug me knowing there were flaky pieces of patchjob hanging off my keel. Even if it makes zero difference to actual speed, i'm one of those people that sails better knowing I've done my prep work. Whether it's wind checks before the startline or cleaning the traveler track, I go faster when the details are in place.
Tried Soy Strip on the bottom paint, expected the cold to make it less effective. Pleasantly surprised to see that it works great, even in 40deg! I had a halogen light on it for about a half hour, and it still scraped right off. Here's the least fascinating video ever, showing how easily Soy Strip took off my VC17.
Scraped off some of the lousy patches from the keel. Like most 40yr old boats, it's got quite the melange of different colors and substances. Brown VC, blue gelcoat, gray lead, white primer (?) red god-knows-what, yellow what-the-hell putty, green chewing gum (i think) and many more.
Started sanding the stbd back edge. Feels great so far. Boat is getting quicker, I can feel it. Here is yet another thrilling keel photo. Hours: 6 today (+3more friday sanding stbd keelside)
Decided to give myself a deadline of getting the keel finished before christmas. May be unreasonable as I've got a few big projects on customer boats. A mast track, a mast step, new furling and repairing this gem:
This boat made a nice wrap on their halyard, and nearly unwound their headstay. The furling line was broken, which makes me that the line breaking possibly saved this boat from losing it's headstay. The scary thing is, I took a look at this boat before this happened. They had a totally different problem that required going up the rig. Before I go up rig's I check all the shrouds, pins etc. Their chainplate pulled out of the deck when I shook it! For that and a billion other rigging faults I strongly cautioned them not to sail the boat, to drop the rig and have a glass guy fix the chainplate bulkhead, while I looked over/fixed the other problems. Argh. Please listen to me when I sound serious!
Monday, December 10, 2007
Merry Christmas from Shields 88
Wasn't planning on doing a Christmas special, but Shields 88 has it's own ornament (s)!
We picked up a tree (most of one anyway) for our apartment, and while putting up ornaments I discovered someone had made an official Shields 88 ornament: a glass globe filled with... teak dust?
Niki remembered my promise to take 200lbs of weight off the boat, and measure it the whole way. Including the dust. Well, she seems to be keeping me honest, as we've got 1oz of teak dust with a holiday theme!
Funny girl. She sails too. And sands things.
Saturday, December 8, 2007
Epoxy in cold temps/Wood2
Went back today to check on the fairing strip epoxy job. The yard is at a pretty constant 30 now, which is too cold for an easy epoxy job. To make it work, I warmed the surface first, kept the epoxy pot warm, and had space heaters and lights going under a tent.
Came back today in order to post cure the epoxy. Postcuring is heating up gelled/cured epoxy to complete the curing process. It's supposed to make it stronger, and in our case, finish off the cure.
The epoxy from the other day had cured, and was hard/firm. I heated it with a heat gun, for about an hour total. Once it was warm to the touch it smelled like wet epoxy, so I assume it was curing.
Stopped by to look at Shields 45, which has new owners. They're in the middle of similar projects to mine, and are currently stripping the bottom.
After the brief visit to the yard, we went to the shop to continue sanding the teak interior pieces. Going very well, almost done. We did a test spot of interlux teak oil, and generally like the way it looks. I'm a little concerned about the slip factor.
Total hours: yard 1, shop 2/2
Thursday, December 6, 2007
Fairing Strips on
Hooray, one more unfun job done.
Originally the Shields came with bronze fairing strips at the back edge of the keel. These covered the gap between the keel and rudder, and acted as a base for fairing compound. Nearly every Shields I've seen has cracks around the strips at the end of the season. I imagine this is due to a)fairing compound not sticking well to either side of the bronze, and the bronze expanding and contracting with temperature.
The solution to this is to replace the stips with fiberglass. I used the cape cod strips, but you could use any piece of fiberglass or G10 better yet.
To remove the old ones I started by trying to take out the 40yr old silicon bronze screws, which strip quite easily. It would take hours to extract all the screws (theres about 16 per side) but it takes about five seconds to grab the bronze strip with a vice grip and tear it off the screws. This is the most fun part of the job. 1hr
Once thats off you've got 30 some holes to fill (I overdrilled and shot epoxy with 404 in) and a surface to clean up. On 88 the surface needed a lot of scraping and sanding to remove the old putties and fillers. 3hr
Next came the fitting of the strips. This is harder than it sounds, as the top end of the strip has to be cut pretty precisely, and the edges have to be beveled. If not, the top of the strip will show a gap where it meets the rudder skeg. In addition,the after edge of the keel is not a straight line, so you either have a gap or shape the front edge of the strip. Also annoying is the #10 half inch self tapping screws I used tend to strip heads when fitting, so I got to extract about 5 of the little bastards. Upside is I got to try a few new screw extractors. Downside is they don't work any beter than the old ones. Really tricky was countersinking the screws correctly. The strips are thinner than the head of the screw is tall, so you have to countersink them slightly into the glass. This is easier once you've set your countersink to the right depth, but it's still easy to go too deep (screw doesn't grip strip) or too shallow (screw head is proud of strip) This part of the job was the most irritating and took about 6hrs
Today I did the last bit and attached the strips. Prep was important. I wrapped the rudder in 6mil plastic to keep it from getting glued. I could have used thinner, but experience tells me that the thin stuff will shrink and melt when heated. Since the yard is now in the 30's I have the whole boat tented, and warmed with a space heater. Additionally, I warmed the surfaces with a heat gun until it's hot to the touch. I used West epoxy with the fast hardener, and lots of 404 and 406 adhesive fillers. Super critical: keep the epoxy warm! I set it down on the ground for a few minutes and it got sludgy and difficult to work with.
The strips are bedded down with the thickenend epoxy, brushed with epoxy on the mating surface then attached with screws. Quite a bit of epoxy came out of the seams, but I figure better that than a void. I kept the heat on with a space heater and 700w halogen light until I left the yard. Hopefully it stays in the 40's inside my tent for a while tonight. I'm returning tomorrow to post cure it with a heat gun. Attaching the strips took around 4 hrs.
To do this again I would budget around 15 hrs including cleanup and heatup. Hopefully his means no cracks to fill at the end of the season.
Next step is to remove the paint from the keel, as I've decided I may as well fair the whole keel at once. Slightly more work, but this means I don't have to work around existing bottom paint. Looking forward to it!
Monday, December 3, 2007
Wood
In order to take a full job off the huge task list, we pulled and started sanding the interior wood from Shields 88. It's pleasant to have a nice straightforward job for once.
There's quite a bit of wood on these boats, you don't realize how much until you have to take it all off! Theres about 65' of 1x1" teak for the toerail, about 30' of thin x 5" teak for the coaming, 4 floorboards and 2 benches. The really special thing about 88's teak is that it seems to be original, so the wood we're messing with has been around for 40 years!
As we found it, it was mostly in ok condition. It was complete, but a bit gray/black, and the birds of Canal Street Marina had definitely labelled it. We took the benches and floorboards out to the shop to sand/oil the whole mess.
Niki was along for the ride, which certainly made getting it off the boat easier! While not too heavy (although I considered ways to lighten it all...) it's awkward to move a wood bench around, under tarps, down ladders etc.
Anyway, here's the photo's to prove we did work. If these aren't convincing, theres about 1 gallon of teak dusk in the shop vac you're welcome to.
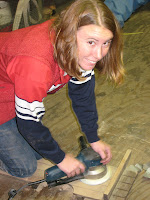
Niki enjoys sanding. She really does. Too bad she works or I'd be setting her to paint prep and going out for coffee all day.
Side by side comparison between the benches. The woods really high quality teak, which I suppose was common at one point. Sands out to a really nice orangish color. Kind of makes me wish we could leave them bare, and keep them inside! They're getting oiled before going back. Not for a second did we consider varnish, as neither one of us feels the shine is worth the work.
What else is going on? Fairing the whole keel now (sigh) as there are a few previous patches that have lousy adhesion. Going to strip it, fill/fair, interprotect and VC17. All of this has to be done with heaters and lights since we're in the unheated building. Looks like we might keep the boat this year, for cost/time/temp issues, but that will free us up for doing more important things, like the bottom and rigging. We've got a new main and jib on the way, which is probably the biggest speed buy we can make.
Coming up soon is finishing off the keel, then starting on the bow repair, forward hull/deck tabbing and then someday I can do what I actually know how to do and rerig the boat.
Thursday, November 1, 2007
The keel seam, abridged
For the readers sake, I've decided to combine posts on the keel seam. Sorry, but there's no way to make that interesting! To promise something good, heres a few things we've got in store for later (read: too cold to epoxy) blog entries:
-partner box and shim system that works! No more gaping hole in the deck filled with wood and doorstops...
-re rigging the mast and boom, so we can bring the boat from 1964 to at least the late 90's
-soft dyneema attachments for just about everything. I bet theres 3lbs of stainless steel bails alone on this boat.
-new control line and deck layout
-much more
For now, Im still working out the keel seam. This has involved quite a bit of labor so far, and theres more to come. A large part of the time involved is my trepidation towards grinding too much. If I could do this again I wager the grinding would take about 4 hours instead of 12! The difference would be in taking off the right amount the first time, instead of chickening out and doing more then next day. Here is a play by play of the keel seam to date:
-strip the bottom paint (see earlier post) to avoid grinding and breathing the VC17
-grind around the keel seam, about 4 inches above and below. This is to make room for the biaxial tape.
-tightening the keelbolts. This part was fairly terrifying, as you're applying a lot of torque to 40 yr old bolts! I used the cape cod instructions and everything turned out ok. There was one bolt that had a broken bronze backing plate, so I ended up making one out of G10 laminate. Great stuff, very strong. I hope I never have to do this again though! Heres a photo of the backing plate before washer and nut. The goop is epoxy and 404 filler, which was squeegeed away before it set, but after full torque was on.
-applying the biaxial tape. This was great fun, especially after all the grinding. Nothing sophisticated here, just two overlapping layers of 15 oz biax cloth layed up hot. Here is the thrilling photo:
As you can see, theres a bit of resin dripping out the bottom of the repair. This is due to some fairly aggresive rolling of the laminate, and was easily cleaned up with a scraper. I figure better to waste some resin than have: a) air bubbles, b) too much epoxy. When all was done I had a nice smooth glass layer, which will hopefully be enough to resist the inevitable flexing that goes on in this part of the boat.
-fairing compound: I applied this hot, ie after the resin holding the glass resin had gelled and gotten tacky, but before it was cured. This means you can put up a couple layers in one go, and not have to clean off amine blush/sand. I used a ton of 407 filler, mixed with a relatively small amount of epoxy to get a very thick mix that hung well to the keel. Applied with a spreader this comes out pretty ready for longboarding.
Next step is to fair, using a longboard and 36 grit, then the inevitable reapply of fairing goop, then more sanding. After that I'll throw on about 4 coats of interprotect barrier coat and sand again, then VC17 in spring.
Yay.
Keel seam:
additional 10 hrs
Friday, October 19, 2007
Grinding... Why did there have to be grinding!
Spent the last two days grinding out the keel seam. In order to lay in enough fiberglass to make the joint strong, I'm taking out quite a bit of fiberglasss with the grinder. While the project is still fun, theres a lot not to like about grinding. It's messy, loud uncomfortable work. I still have more to do and the shop vac already has about 3 gallons worth of dust in it, thats not counting the dust that has attached itself to my skin either...
There's really nothing fun or interesting about this part. Here is a photo anyway:
What is slightly more interesting is the job Im trying to convince Niki to help me with tomorrow, keelbolts. As long as I'm doing the seam repair, I might as well (theres that saying again...) tighten up the bolts. So tomorrow I'm going to loosen all the bolts, put some new glass under the backing plates, and tighten them all up with God's own torque wrench. Not exactly fun, but it's a nice break between grinding sessions. It's also going to be most effective before I glass the seam.
Heres a shot of one of the things I really liked about 88. Most Chris Craft Shields have a bunch of plywood that makes up the mast step support. This one has a more modern fiberglass support, which is certainly stronger, and probably lighter than a mass of rotten plywood. This also makes it much easier to access the forward bolt. If the boat didn't have this, I would probably have to make one.
I keep trying to think of a way to make the last couple days work sound interesting, and all I can thnk of is sitting on the trailer, grinding a steady stream of abrasive dust into my face. The only fun part is every couple minutes I stick the shop vac all over my head, and into the glasses, to get rid of dust and condensation. That much look funny I suppose.
Tuesday, October 16, 2007
Repairing the dreaded keel seam
Nearly every Shields I've seen has a telltale crack running the length of the keel, right below the hull/keel intesection. It's caused from an inperfect joint between the molded hull and the deadwood ("filler" area between lead of keel and the hull)
Theories on how best to fix this vary, some people say since the joint moves, the fix should be flexible putty, others have tried epoxy filler to seal up the crack. Below is a shot of 88's crack, it's not as bad as some, but its definitely there and it was definitely annoying me to look at it.
The fix we're trying is a bit more involved, but hopefully more permanent. Im going to grind the area around the keel seam, and cover the seam with fiberglass and epoxy, then fair and repaint. This will sheathe the seam instead of trying to fill it, and hopefully banish the cracks. This is the one fix all three of my Shields repair/fiberglass people agree on!
To start out, I had to get rid of the paint over it. Easy way would be to sand it off, but since this is bottom paint and the boat is inside, I didn't want to throw copper dust in the air.
I decided to try the soy strip on a large area and see how it went. This stuff is great! Here's how it went:
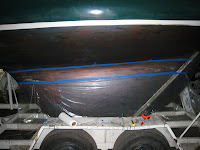
First I masked off the keel, with a 7" gap left open over the seam. I taped plastic sheet to the bottom of the masked area and draped it over the trailer. I used the plastic to protect the lower keel from drips, and to catch the scrapings which would (hopefully) be falling off.
The soy strip is pretty odorless, and looks a lot like honey in consistency. I brushed it on pretty thick, and it hangs well on the vertical surface. I probably had about 1/8" thick layer on the keel.
Within about a half hour, the paint was lifting right off! I was really impressed with this and couldn't help scraping a section. It came off really easily, but I figured it could only get better with a little more time so I reapplied and walked around the yard to measure other Shields for waterline locations.
I gave it about 2 hours, and started scraping. The paint came off in sheets from the deadwood, and was only a little more stubborn coming off of the bottom of the hull. The difference between the two was that the deadwood had been repainted at some point and had a barrier coat primer, and the hull was gelcoat under the VC17. Even on the gelocat the paint came off with one or two good scrapes. To scrape off a 7"x6' area took about 5 minutes.
When it was scraped I washed with water, then acetone to take off any tenacious globs of paint, and the water again. All the mess did indeed land in the plastic and tossed away.
When I was done I took a step back, and was pretty pleased with the way I had just taken a pretty ok looking bottom and made a great big ugly stripe across the bottom. As you can see in the photo, theres quite a lot of different paints and materials left underneath, as people have tried many times to fix the keel joint. Hopefully my fix is the last!
Whats next is to grind out the seam, wide and deep enough for a couple layers of fiberglass cloth tape to be epoxied in, then fill and fair, barrier coat and in spring repaint. The rest of the bottom is in really nice shape except for the fairing strips, and can be wetsanded and repainted.
Oh, and Niki's parents stopped by to see the boat yesterday. In this photo I asked them to give me a skeptical look for us buying a boat. They don't look too skeptical, so I will assume they think it's a great idea!
Friday, October 12, 2007
Big day for Shields 88
,
Lots going on with the boat this week:
-Received title for the boat, ITS OURS! (along with something called a Sea Nymph 12, which Im told is a nice way to say "giant ugly metal dinghy")
-met with Mick, our local fiberglass guru
-started the nasty work on the boat
Although it's just a paper formality, it still felt great to have paper in hand. Turns out our boat was built in 1968, so it's going to turn 40 next year! Just the right time for a refit I'd say.
Our neighbors large orange cat stopped by to join in the celebration, and it looks like he's laid claim to the title!
Meeting with Mick our fiberglass guy was great. He can tell more in 5 minutes of looking at the boat than I could in a week. When in doubt, go with a pro! From his point of view, what we need to do is:
-fix toerail seam, which is seperated in a few places. I'll be grinding back 2" from the edge along the deck and hull, and glassing in fiberglass tape and fairing. Sounds straightforward enough, but labor intensive. See the joint below, and also, it turns out our boat was first blue!
-Mick is going to do the repair on the bow, after I do the prep. This is not a structural area (until we hit something) but I still want it done right. I'm hoping to learn as he does it.
-He was strongly suggesting that we spray awlgrip on the topsides, but I don't think its quite in the budget. We shall see, it would be really nice as the finish with AG is just great. Would kind of be straying from my philosophy of speed first, and its much more expensive to have sprayed, than to roll it myself. If I could, I would absolutely use Mick to do all the glass and paint work, he does really amazing work.
Theres a little story that I think is a good testament to his skill: Both Mick and I were doing some last minute rush work to an Etchells on its way out of town. He was doing gelcoat repair, and I was doing some rigging upgrades. The whole time we're working, he's swearing up a storm and declaring his work to be utter crap. After an hour of this I go to take a look at this lousy job he's supposedly doing. I couldn't even find the repair he was making until he pointed it out (when I almost stuck my hand in it!). I don't know why, but I instantly trust eastern europeans that downplay their own quality work! He can be found at Lakeshore Marine
I started today by removing the toerail. Not hard work at all, but has to be done. Felt good to be launching into the work. Also removed the vinyl rubrail. It makes some sense to replace it with new rail in better condition (to protect against dings, etc). BUT. I hate the way that stuff looks, it gets ugly fast, and is easy to tear, which means you end up with a duct tape repair:
In addition to the fact that it's ugly, and extra weight, I dont think it does all that much. In every collision I've seen between Shields (about 8), the rubrail has been no where near the collision. I think we'll go 150-style and delete the rubber.
Also did a test on how to remove the paint. Tried scraping, sanding (with DA) and soy strip. The scraping was ok, but lots of effort for a small area, coupled with the scratching if you're not careful, make that seem like a bad idea. The DA sander worked really well, clearing a 6"X 24" area in about 2 minutes. Left a nice finish too. The soy strip softened the paint, but didn't make it through the primer.
I did try the soy strip on the bottom, its unreal. It took all the VC17 off, leaving the barrier coat intact, in about an hour at 60 degrees! Wow. If I strip the whole bottom I will definitely use this stuff! www.franmar.com
Hours:
Kristian, 4 hours to remove toerails and rubrail 2 hrs to test paints and shoot the shit with the fiberglass guy.
Mood: jubilant but achy back
Monday, October 8, 2007
How we ended up with a boat...
All it took for us to end up with our very own Shields was Niki coming home from work, and saying, in a very offhand way, "maybe we should just buy a boat".
I don't know if she was entirely serious at the time, but about 2 weeks later we were there at the yard, tearing the boat apart. Money had been sent out, parts were on order and we were definitely in "lots of stuff is happening quickly" mode.
Looking back, and judging by how fast we pulled it all together, it seems like I've been planning on doing this for a while, probably since about the second time I sailed a Shields. Seems that having someone else think that it wasn't a terrible idea was all it took to make it happen. And Niki is a bit boatcrazy too, and is in fact driving a lot of the cool upgrades we're making. I don't have to say it, but Niki is amazing. She's also going to be doing bow. (!)
So, the why is easy: they're absolutely great boat to sail whether you're daysailing or racing. This particular one had been sitting in the yard for a while, and our local racing fleet would be much better off with one more boat out racing. Since I own a boat rigging business, I could devote a lot of time to it in the slow winter season. I've sailed on Shields for the last 7 years, and have done pretty well as crew. The few times I've gotten to drive a boat it's been great fun. Niki has sailed Shields on and off for the last 3. We have somehow managed to sail together pretty well as a couple too.
The how is going to be, quite simply, a lot of work. We could probably do so a couple hours of work and throw the thing in the water next spring, but while we're doing it, we might as well do it right! We've got some big plans for the boat, to make it faster, easier to sail, and while we're at it, prettier.
The boats got some damage, where the last owner had a bad interaction with a powerboat on the 4th of July. Not that hard to picture if you've seen Lake Michigan on the 4th. Picture if you will a parking lot filled with cars, then picture everyone getting ridiculously drunk and driving around at max possible speed. It's great! What this means for us is that the bow of the boat is pretty messed up. The deck is peeled back for about 8", and the stem is cracked and shoved to the side for the top 6" or so. This is going to take a lot of grinding, glass work and fairing to make right.
While we're at it (may as well be the boat motto judging by how it's affecting our planning) we wanted to paint the topsides. Its currently dark green, and doesn't look too bad. I've always wanted a gray boat, and as long as we're painting the bow..... we might as well strip, fair and paint the topsides! We're probably using Interlux Perfection in the platinum color, which is a fancy way to say medium gray.
The bottoms in good shape, but in order to have no excuses, I wanted to fair it. So we might as well strip it, reglass the keel joint, fair it and paint it. Fast bottom's are cool.
The deck is nice and solid, but we're going to do a LOT of tweaking to the deck layout. The watchwords here are : simpler, easier, and lighter. So again, while we're filling in holes and things, we might as well paint the damn deck too. Just white, and no fairing. I can't make myself longboard something that has no effect on performance!
Of course we've got lots of plans for rerigging the boat, and I'll get in to that in later installments.
For now we just came back from a fun day of boatwork. I do this kind of stuff for a living, because I love it. Even when it's miserable difficult work, and hard business, I love it. So even I was surprised how satisfying it was to work on my boat, how much better it can be. Even though today was some pretty gross work, I loved every minute. Niki was there too, and it's always better working when theres someone fun around.
What we did:
Took an insane amount of stuff off the boat. This ranges from things like the padeyes for attaching the cover to (BAD WEIGHT) to lots of little storage dohickeys ( there are coatracks on the front bulkhead!!) to just extra crap on the boat (you do not need 4 vicegrips and 8 rolls of tape). I'm tracking the weight, with a goal of taking 200lbs off the sailing weight of the boat. That seemed like a lofty goal, but Im starting to think it's doable. I will photo some of the hilarious crap that we pulled off, such as two different ensign staffs. I don't think we'll need these , unless we get a burning desier to have more flags on the boat (no).
Started working on the bottom. This meant taking the old bronze keel faring strips off prepping for the new glass ones. I also drilled a few holes in the deadwood, which resulted in about a gallon of water seeping out. This boat has sat for two years with that much water in the wood! Hope that doesn't hurt us later.
Can't wait to get back there!
Total hours:
Kristian 4
Niki 4
satisfaction: through the freakin roof
Subscribe to:
Posts (Atom)